Monitor
Connect a Drone
On the Monitor screen, the user handles the main features of drone operation. To connect the first drone the user should click on the green button on the bottom left side of the screen.
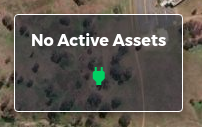
Fig. 88 Monitor – example of the first drone connection
After selecting the connect button, the Direct Connect dialog will appear with the following options:
Name - This field must be unique for each new drone connection. The platform will autogenerate a new sequential name for each connection.
IP - The user should provide the drone’s IP to be connected.
Port - The user should provide the correct Port of the drone to be connected.
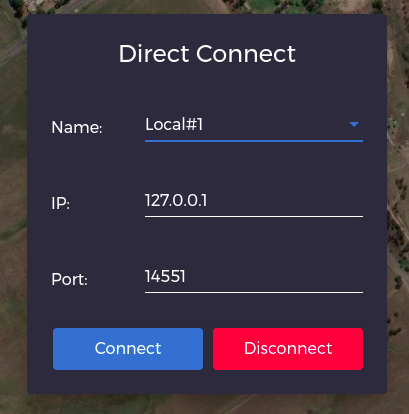
The user should now press the Connect button to establish the connection to the drone. If the connection is successful, the platform will show the telemetry data of the drone. If on the other hand, the IP or Port is wrong, the connection will not be established and after a short delay, the connection will be discarded by the platform.
To connect the remaining drones, the user should press the cog wheel on the Active Assets display, the Asset Settings dialog will appear and the user should navigate to the Miscellaneous tab and press Connect Drone. After that, the procedure is the same as before.
Disconnect a Drone
To disconnect a drone, the user should select the desired drone to disconnect on the Active Assets display on the bottom left side of the screen, then press the disconnect red button.
Bottom Telemetry Bar
The bottom telemetry bar of the platform displays useful information to the user about the selected drone.
Flight Mode Button - The button displays the costume flight modes of the drone. The modes can be Cinema, Position, and Sport. These modes provide the drone with a set of parameters for different types of handling all based on the Loiter flight mode.
Flight Mode - This field displays the current flight mode, the user can press it to change the flight mode of the drone.
Arm Status - This field shows the arm status of the selected drone.
Vertical Speed - The vertical speed in meters per second of the selected drone.
Horizontal Speed - The horizontal speed in meters per second of the selected drone.
Altitude - Displays the altitude distance in meters of the drone.
Battery Bar - Displays the battery percentage of the drone, after takeoff shows the session flight time, the user can press the bar to access more information about the total flight time of the drone and, the total run time of the drone.
GPS Fix Mode - Displays the current type of GPS connection.
During a mission, this bar changes color and adds different information and utilities.
Progress Bar - Displays the current progress of the mission, if the user presses the Show Mission button on the left side of the screen, this progress bar becomes clickable and shows the total distance of the mission.
Pause Mission - On the right half of the bar the user can pause the mission.
Resume Mission - On the right half of the bar the user can resume the mission after it has been paused.
Clear Mission - On the right half of the bar the user can clear the mission from the drone, this will bring back the default telemetry bar and the drone is no longer on a mission.
For VTOL aircraft the left half of the bar displays two sliders to provide better control.
Loiter Radius - This slider gives the user the possibility to adjust the loiter radius for guided flight mode, for better convenience, the user can also type the radius in meters on the display field of the slider.
Altitude - This slider gives the user the possibility to adjust the altitude for guided flight mode, for better convenience the user can also type the altitude in meters on the display field of the slider.
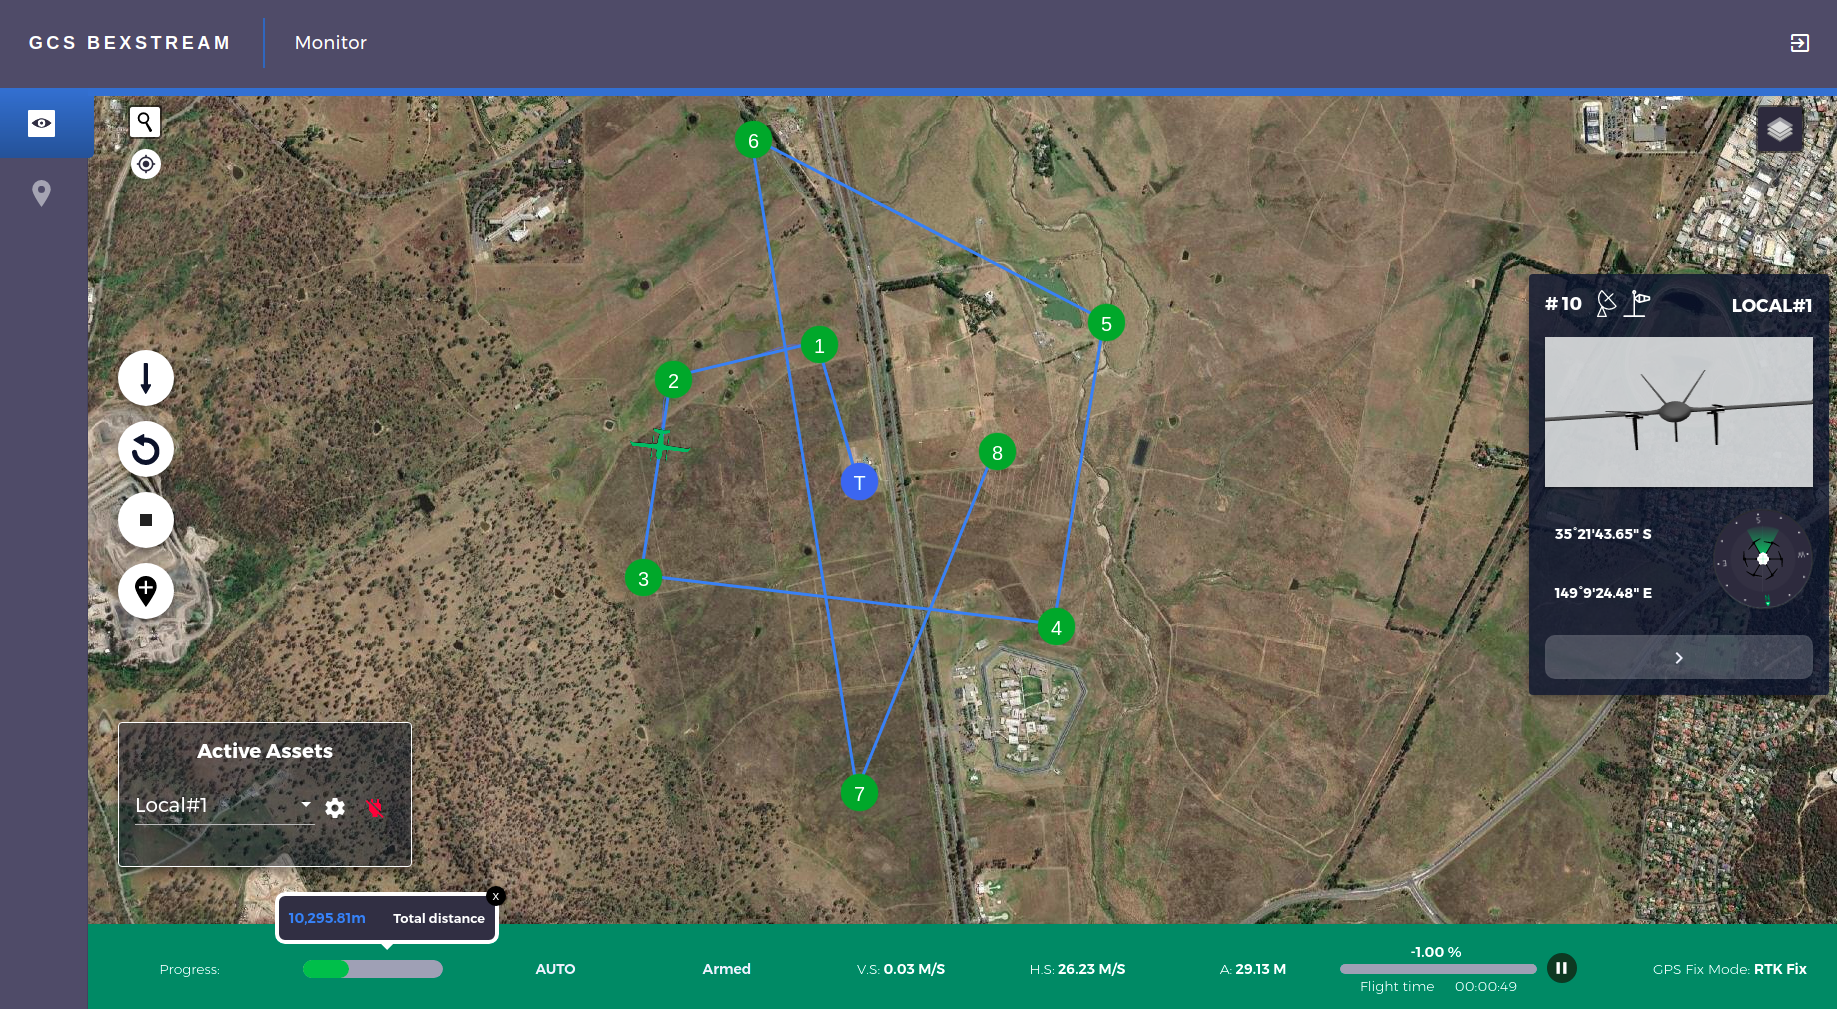
Fig. 89 Monitor – example of telemetry bar in mission mode
The previous figure shows the example of the telemetry bar in mission mode.
Drone Flight Display Area
The display on the right side of the screen provides the user with a series of useful information. From top to bottom, the elements include:
Number of Satellites: Indicates the number of satellites providing GPS data.
Wind Speed Indicator: A clickable indicator that, when connected to the internet, displays the current wind speed forecast for the location and direction.
Drone Name: The name of the selected drone.
Animation Canvas: Shows the pose of the drone.
Current Position: Displays the current position of the drone.
Compass: Displays the heading of the drone.
Stream Display: If active, this displays a stream from the drone. It is clickable to switch between map view and stream view.
Collapse Button: Maximizes the map view for the user, collapsing the Flight Display Area.
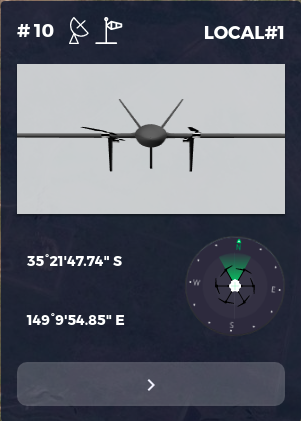
Fig. 90 Monitor – drone flight display
The previous figure shows the drone flight display area.
Map Area
The Map Area is packed with useful utilities to enhance your flight experience. Here’s what you can do:
Search Location Icon: Located on the top left, this icon lets you search for locations by name, making it easy to navigate and plan your flight path.
Re-center Map Toggle: Keep your drone always in view with this toggle, ensuring you never lose sight of your drone.
View Switch: In the top right corner, seamlessly switch between a satellite view and a street map to get the best perspective for your needs.
Get Coordinates: Need precise coordinates? Hold the Ctrl key and drag your mouse across the map to get the exact coordinate value of any point.
Asset Settings
The Asset Settings can be accessed by clicking on the cog wheel button located on the active assets display. This action opens a pop-up window with a series of tabs, each offering specific settings to enhance the user experience.
Controls Tab
In the Controls tab, users can enable drone and/or gimbal control via a joystick or the keyboard. These controls are customizable, allowing users to adjust key bindings to their preference for a more tailored and intuitive interaction.
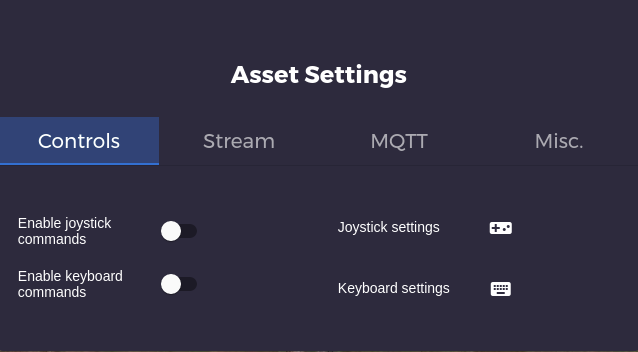
Fig. 91 Monitor – asset settings controls tab
The previous figure shows the asset settings controls tab.
Stream Tab
The Stream tab provides options to enable the RTSP Server, which activates the stream display in the Drone Flight Display Area. Here, users can configure settings for the streaming server, including:
Stream URL: Generate a URL to view the stream in a browser window.
RTSP URL: Change the RTSP URL to suit specific needs.
Recording: Record the stream to a computer file in .mp4 format.
Open Stream Window: Open multiple windows with different drone streams, providing flexibility in monitoring various streams simultaneously.
With Camera FOV toggle the user enables a map reference to where the camera on the drone is pointing, by clicking on the green icon on the Active Assets display, the user can add relevant marks to the map.
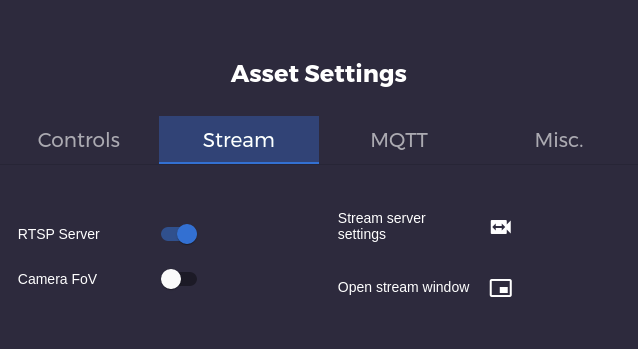
Fig. 92 Monitor – asset settings stream tab
The previous figure shows the asset settings stream tab.
MQTT Tab
The user can Publish MQTT different custome topics, and also publish the current drone position.
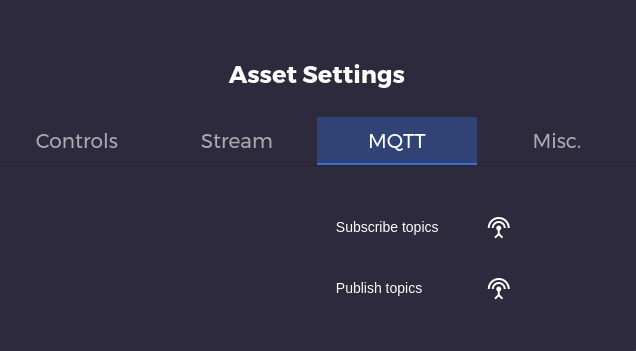
Fig. 93 Monitor – asset settings mqtt communication tab
The previous figure shows the asset settings mqtt communication tab.
Miscellaneous Tab
In the Miscellaneous tab, users have access to a variety of essential settings and features to enhance their drone operations:
Drone Connections:
Users can make additional drone connections, as explained in the “Connect a Drone” section. This feature ensures seamless integration and control of multiple drones.
Internet Connectivity:
Connecting the drone to the beXStream platform via the internet is straightforward with the correct configuration file. This enables control through both the GCS beXStream and the beXStream platform, providing a robust and versatile control experience.
Offline Maps:
Users can download maps with varying levels of zoom while online, ensuring they have the necessary geographical data for operations in areas with limited or no internet connection. This functionality is crucial for planning and executing missions in remote locations.
Geofence:
The geofence feature helps keep the drone within a designated polygonal area set by the user. Once enabled, an icon appears on the Active Assets display. Users can draw the geofence by double-clicking on the map to add points and dragging them to adjust the polygon. To erase points, simply double-click them and confirm the action. This tool provides an added layer of safety and control during drone operations.
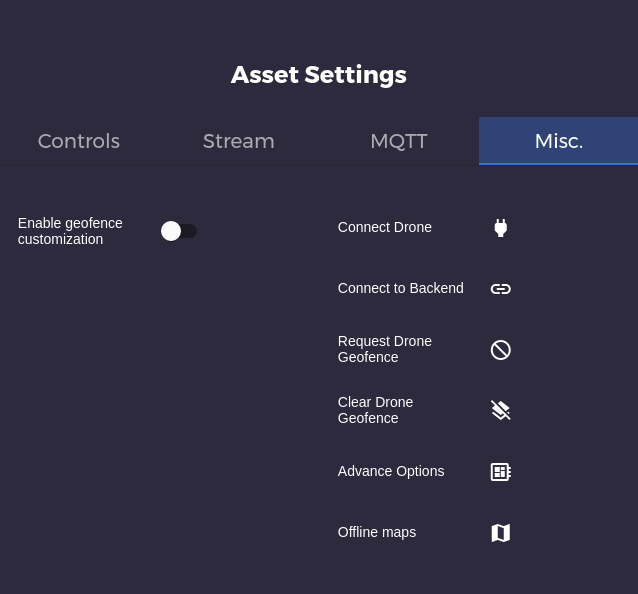
Fig. 94 Monitor – asset settings miscellaneous tab
The previous figure shows the asset settings miscellaneous tab.


